#MetaQuest3 #VRFileTransfer #WindowsToMetaQuest #MacToMetaQuest #CloudStorage #SideQuest #VRTips
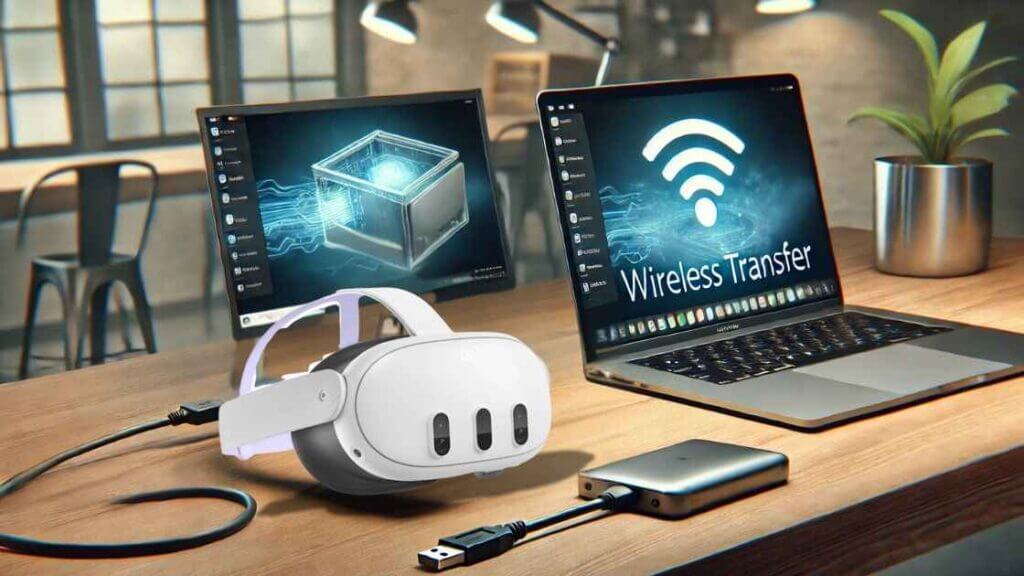
How to Transfer Files to Meta Quest 3/3s From Windows and Mac: The Meta Quest 3 and 3s are powerful VR headsets that allow you to enjoy immersive experiences, but managing files between your headset and your computer can sometimes feel tricky. Whether you’re transferring videos, screenshots, or other files, this guide will walk you through the process step-by-step for both Windows and Mac users. Plus, we’ll explore wireless options like cloud storage and file-sharing services.
To transfer files to your Meta Quest 3/3S:
- Turn off Quest Link if it’s causing problems.
- Use SideQuest or enable Developer Mode for more options.
- Look for the pop-up notification or enable it in settings.
- If all else fails, try transferring files from your phone using a USB cable.
How to Transfer Files Between Windows PC and Meta Quest 3/3s?
Transferring files from a Windows PC to your Meta Quest 3/3s is straightforward. Here’s how to do it:
Step 1: Connect Your Meta Quest to Your PC
- Use the Quick Link cable (included with your Meta Quest 3/3s) to connect your headset to your Windows PC.
- When prompted on your headset, allow your PC to access photos and videos. If you don’t see the pop-up, go to Settings > Developer > Enable MTP Notification. This makes sure the pop-up shows up.
Step 2: Open File Explorer on Your PC
- Press
Windows + Eto open File Explorer. - Navigate to your Meta Quest headset under “This PC.”
Step 3: Locate the Folders
- Open the Internal Shared Storage folder.
- Navigate to the Oculus folder, then choose either:
- VideoShots for videos
- Screenshots for images
Step 4: Transfer Files
Copy and paste your files into the appropriate folder (VideoShots for videos, Screenshots for images).
That’s it! Your files are now transferred to your Meta Quest 3/3s.
| NOTE: Disable Quest Link to Transfer Files When Quest Link is on, the computer thinks the headset is just for VR, not for file transfers. By turning it off, the computer sees the headset as a storage device, like a USB drive. After transferring files, you can turn Quest Link back on. You can learn more about turning off Quest Link below in the article. |
How to Transfer Files Between Mac and Meta Quest 3/3s?
Transferring files to your Meta Quest 3/3s from a Mac requires a bit more effort since macOS doesn’t natively support direct file transfers. Here are two methods to get the job done:
Method 1: Using the Android File Transfer Tool
Step 1: Download Android File Transfer
- Download and install the Android File Transfer tool on your Mac.
Step 2: Connect Your Meta Quest to Your Mac
- Use the USB cable to connect your Meta Quest 3/3s to your Mac.
- Tap the notification on your headset to allow file access.
Step 3: Transfer Files
- Open the Android File Transfer app on your Mac.
- Drag and drop files between your Mac and the Meta Quest folders.
Method 2: Using the SideQuest VR App
Step 1: Download SideQuest
- Visit the SideQuest VR website and download the macOS version.
- Install and launch the app.
Step 2: Sign In to Your Developer Account
- Create a developer account on the Oculus Developer website if you don’t already have one.
- Sign in to SideQuest using your developer account credentials.
Step 3: Transfer Files
- Click on the Files tab in SideQuest.
- Navigate to the desired folder and drag and drop files between your Mac and Meta Quest.
How to transfer files to Meta Quest 3/3S without a PC?
- Use cloud storage (Google Drive, Dropbox, etc.) and download files via the Quest browser.
- Use file-sharing apps like AirDrop, Snapdrop, or ShareDrop.io through the Quest browser.
- Transfer files wirelessly using SideQuest or apps like X-Plore with Wi-Fi FTP.
How to transfer files to Meta Quest 3 from android/Phone?
If you’re using an Android phone, you can transfer files using a USB-C cable. Just make sure your phone is set to File Transfer Mode (not just charging). You can use the Quest File Browser to manage the files.
Wireless File Transfer: Using Cloud Storage
If you prefer a wireless solution, you can use cloud storage services to transfer files to your Meta Quest 3/3s. Here’s how:
Step 1: Open the Browser on Your Meta Quest
- Click on the Apps icon and select the built-in browser.
Step 2: Access Your Cloud Storage
- Visit the website of your preferred cloud storage service (e.g., Google Drive, Microsoft OneDrive, Dropbox).
- Sign in to your account.
Step 3: Upload or Download Files
- Upload files from your PC to the cloud storage service.
- Download the files on your Meta Quest using the browser.
Alternative Wireless Methods
You can also use file-sharing services like AirDrop, ShareDrop.io, or Snapdrop to transfer files wirelessly:
- Open the file-sharing service on both your PC and Meta Quest browser.
- Select the files you want to transfer and follow the on-screen instructions.
How to Transfer Files Fast Using USB 3.1 and Virtual Desktop?
If you want to transfer files from your Meta Quest 3 to your PC really fast, you can use a USB 3.1 cable and a program called Virtual Desktop. Here’s how to do it:
Step 1: Connect Your Quest to Your PC
Plug your Meta Quest 3 into your PC using a USB 3.1 cable. A pop-up will appear on your Quest saying “USB connection found.” Click on it.
Step 2: Say No to Quest Link
After clicking the pop-up, another window will ask if you want to open Quest Link. Say “No” to this question three times. This makes sure Quest Link doesn’t start and lets you transfer files instead.
Step 3: Open Virtual Desktop
Start the Virtual Desktop program on your PC. Once it’s running, you’ll see a Quest 3 icon in your PC’s file explorer.
Step 4: Find Your Files
Open the Quest 3 icon on your PC. Go to the Oculus folder, then open the VideoShots folder to find your video clips.
Why This Method is Great?
- It’s super fast because USB 3.1 transfers files quickly.
- You don’t need to use Wi-Fi or cloud storage.
- Virtual Desktop makes it easy to find and move your files.
Steps to Turn Off Quest Link
- Put on Your Headset
Turn on your Meta Quest and put it on. - Open the Settings Menu
- Press the Oculus/Meta button on your right controller to open the universal menu.
- Select the Settings icon (it looks like a gear) at the top right.
- Go to System Settings
Scroll down and select System from the settings menu. - Turn Off Quest Link
- Look for the Quest Link option.
- Toggle it off to disable Quest Link.
Alternative: Disable Auto-Start for Quest Link
If you want to stop Quest Link from automatically starting when you connect your headset to a PC, follow these steps:
- Enable Developer Mode
- Go to the Meta Quest app on your phone.
- Select your headset, then go to Settings > Developer Mode and turn it on.
- Open Developer Settings on Your Headset
- On your Meta Quest, go to Settings > System > Developer.
- Look for the option that says “Automatically Start Quest Link on Connection” and turn it off.
Quick Fixes
- If the pop-up doesn’t show up, check your notifications.
- If Quest Link keeps starting automatically, disable it in Developer Mode.
- If your computer doesn’t recognize the headset, try restarting both devices. (How to Transfer Files to Meta Quest 3/3s From Windows and Mac)
Closing Thoughts
Transferring files to your Meta Quest 3/3s doesn’t have to be complicated. Whether you’re using a Windows PC, a Mac, or a wireless method like cloud storage, this guide has you covered. Following these steps allows you to easily manage your files and enjoy a seamless VR experience.
Do you have questions or tips of your own? Please share them in the comments below!
FAQ: How to Transfer Files to Meta Quest 3/3s?
1. How to transfer files onto Meta Quest 3?
Connect your Quest 3 to a PC or Mac using a USB cable. On your PC, open File Explorer (Windows) or use Android File Transfer (Mac). Drag and drop files into the Quest’s folders.
2. How do I upload videos to Meta Quest 3?
Transfer videos via USB or cloud storage. For USB, copy videos to the Oculus/VideoShots folder. For cloud storage, use the Quest browser to download videos.
3. How to open files on Meta Quest 3?
Use the Files app on your Quest 3 to browse and open files. For videos, use a media player like Skybox VR or Pigasus.
4. How do I enable USB transfer on Quest 3?
Connect your Quest 3 to a PC via USB. On the headset, allow access when prompted. If no prompt appears, enable Developer Mode and check MTP Notification in setting
5. Can you download movies to Meta Quest 3?
Yes! Use the Quest browser to download movies from websites or cloud storage. Save them to the Downloads or VideoShots folder.
6. Can you use external storage on Meta Quest 3?
No, the Quest 3 doesn’t support external storage. You’ll need to use its internal storage or cloud services.
7. What video format is Meta Quest 3?
The Quest 3 supports common formats like MP4, MKV, and AVI. For best results, use MP4 with H.264 or H.265 codecs.
8. How to install APK on Quest 3?
Enable Developer Mode, then use SideQuest or ADB to install APK files. Connect your Quest to a PC, open SideQuest, and drag the APK to install.
Read More:
How to Set Up Your Meta Quest 3 or 3S VR Headset?