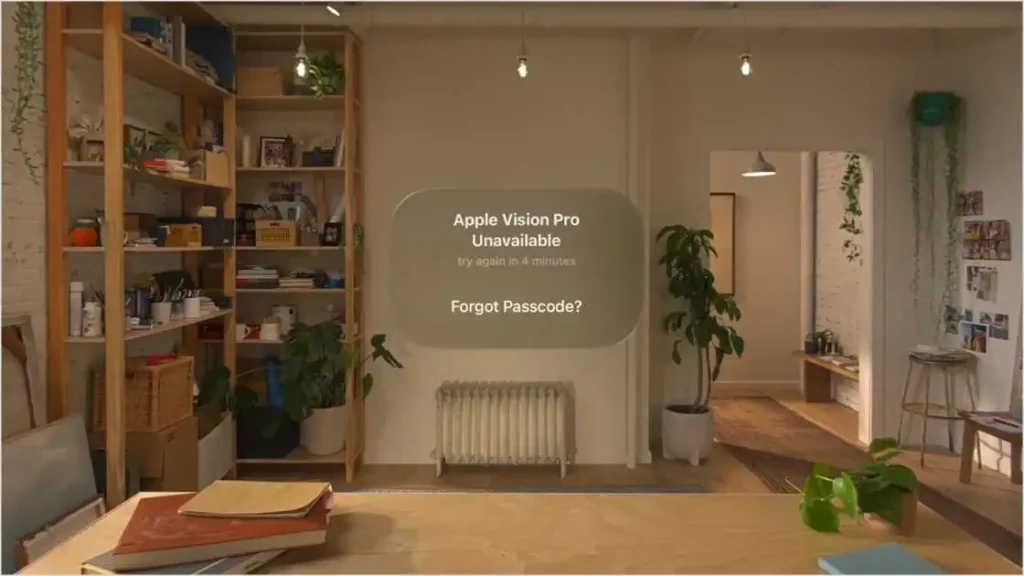
Apple Vision Pro, Password, Reset, Apple Vision Pro Unavailable, Forgot Passcode, Apple Account password, Apple Support, iCloud, visionOS.

Apple Vision Pro Passcode: Apple Vision Pro is a mixed-reality headset offered by Apple. It is one of the state-of-the-art VR headsets currently available in the market. As it is coming from the Apple family, the price of this cutting-edge headset is $3500. It will be heartbreaking if you lose or forget the Vision Pro passcode. However, you cannot deny the possibility of forgetting it. Today, we will try to find the best possible way to regain access in unfortunate situations.
How Many Attempts Are Allowed for the Wrong Apple Vision Pro Passcode?
As per the Apple Support portal, if you type the wrong passcode four times in a row, a notification will pop up saying ‘Apple Vision Pro Unavailable‘ with a locking period of minutes similar to the Apple iPhone or iPad. If you remember the passcode at a given time, you can unlock the device. However, if that is not the case then you have to reset the Vision Pro headset.
Before you erase and reset your Apple Vision Pro
Remember, In this unfortunate situation, you must have your Apple Account password that was used when setting up the Vision Pro. If you haven’t used your account on Apple Pro then you have to contact the Apple Support for help to reset your headset.
Keep in mind that resetting your headset will erase all data hence it is always a good practice to back up your headset regularly. If you have backed up your device earlier in iCloud that backup can be restored post-headset reset to get all your data back.
How to Erase Your Apple Vision Pro After Forgetting Your Passcode?
Follow the given below steps to erase the headset:
- Tap the “Forgot Passcode?” button that appears after four incorrect passcode attempts.
- Tap Start Apple Vision Pro Reset.
- If asked, choose a Wi-Fi network you can connect to.
- Enter your Apple Account password to sign out of your Apple Account.
- Tap Erase Apple Vision Pro to confirm, then take off your Apple Vision Pro.
After erasing Vision Pro successfully, it will restart automatically, put it back on and follow the steps from the screen to start the VisionOS setup process. Once the setup process is complete, you can set up your Vision Pro as a new device or you can restore your backup with the data and all the settings as it was earlier.
How to Restore Apple Vision Pro from a Backup?
If you have a backup available in iCloud, follow the given below steps to restore the backup.
- Power up recently reset Apple Vision Pro.
- To set it up, choose one of the following options:
- Select Set Up Manually and proceed by following the on-screen prompts.
- If you own an iPhone or iPad running iOS 17, iPadOS 17, or newer, you can use Quick Start for an automatic setup. Position the devices near each other and follow the provided steps. Afterwards, restore your data and content to the Apple Vision Pro using your iCloud backup.
Easy Steps to Backup Vision Pro?
To avoid losing all your headset data and settings, it is always a best practice to backup your device. You can follow the below steps to back up Vision Pro.
- Go to Settings (Gear Icon)> [your name] > iCloud > iCloud Backup.
- Turn on iCloud Backup.
- To perform a manual backup, tap Back Up Now.
- To view your iCloud backups, go to Settings > [your name] > iCloud > Manage Account Storage > Backups.
- To delete a backup, choose a backup from the list, then tap Delete & Turn Off Backup.
| Note: If you turn on iCloud syncing for an app or feature (in Settings > [your name] > iCloud > Show All), its information is stored in iCloud. Because the information is automatically kept up to date on all your devices, it’s not included in your iCloud backup. |
Conclusion:
It’s not always possible to remember passwords to anyone, there are always unfortunate situations where we forget the password. Having a regular backup policy helps us to survive these unfortunate events. We hope you will get some benefit from our article and enjoy your virtual world with peace full mind without worrying the losing data or passwords.
