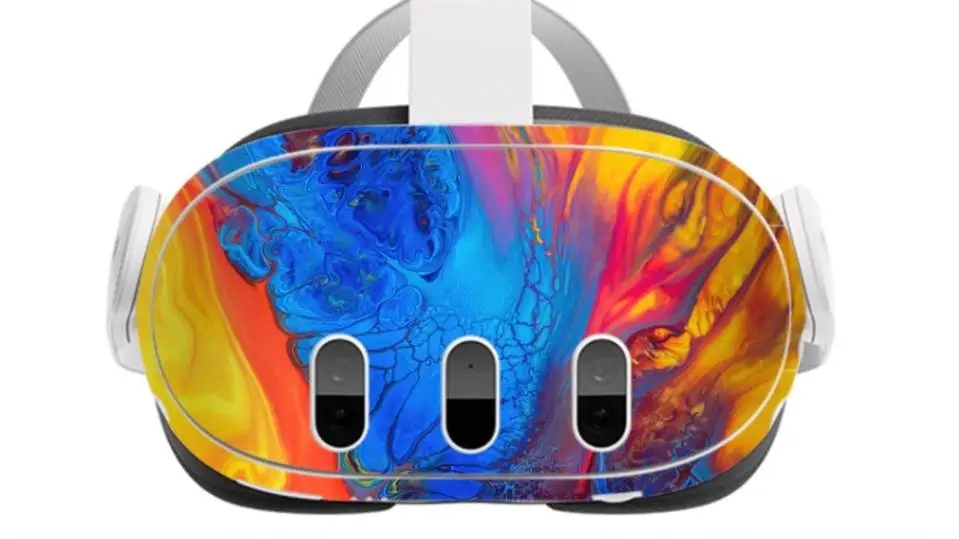
Personalize your Meta Quest 3 with amazing decals! Discover the best places to find unique designs, easy application tips, and how to protect your VR headset.

Meta Quest 3 Decals: It’s a total game-changer for VR, no question! But who wants a boring, off-the-shelf look? Time to make your headset totally YOU. Decals to the rescue! Think of them as awesome armour for your Quest 3, but armour that screams your style. Want a galaxy swirl? Done. Dragon scales? Yep. It’s your world – let’s get customizing!
What are Meta Quest 3 Decals?
Meta Quest 3 skins are thin vinyl wraps designed to fit snugly onto your headset, often also customizing the controllers. They come in an incredible variety of colours, patterns, and artistic styles, adding a personal touch and a layer of protection against minor scratches or wear and tear.
Why Use Decals on Your Meta Quest 3?
- Customization: The most significant advantage of decals is the endless possibilities for personalization. Whether you’re into superheroes, abstract art, pop culture references, or simply want a sleek, new colour, there’s a VR skin out there for you.
- Protection Decals create a barrier against minor scratches, scuffs, and everyday wear and tear, keeping your Meta Quest 3 looking pristine.
- Improved Grip: Some decals feature textured finishes, which can provide enhanced grip while using the controllers, especially during intense gaming sessions.
- Express Yourself: VR skin allows you to showcase your interests and individuality, making your VR setup a reflection of your style.
- Affordable Transformation: Compared to custom paint jobs or complex modifications, decals are a cost-effective way to revamp the look of your Meta Quest 3.
Read More: The Ultimate Guide to Flight Sim VR Headsets
Types of Quest 3 Decals
- Full Wraps: These decals cover the entirety of your headset and controllers, offering maximum customization and protection.
- Partial Decals: Partial decals let you focus on specific areas of the headset or controllers, adding accents and highlights.
- Character/Theme-Based: Popular choices include decals featuring iconic characters, logos, or patterns from movies, video games, TV shows, and more.
- Textured Decals: Choose from finishes like carbon fibre, leather, wood, or metallic for a distinctive look and feel.
- Custom Designs: Some companies allow you to upload your own images or designs, creating truly one-of-a-kind decals.
Where to Find the Best Meta Quest 3 Decals?
Several online retailers and marketplaces specialize in VR headset skins, offering an extensive array of choices. Here are some popular options:
- Slickwraps: Offers a vast range of designs, materials, and even custom design options.
- MightySkins: Known for their durable and easy-to-apply skins in a wide variety of styles.
- DecalGirl: Features a huge collection of artistic and playful designs.
- Amazon: A convenient place to find numerous decal sellers and compare prices.
- Etsy: Discover unique handmade and custom decals from independent creators.
Tips for Choosing Your Perfect Decals
- Quality: Opt for decals made from high-grade vinyl for durability and a professional look.
- Precision Cut: Precisely cut decals ensure a seamless fit on your Meta Quest 3.
- Ease of Application: Choose decals with clear instructions and consider your skill level.
- Removability: Ensure the decals can be removed without leaving a sticky residue.
- Design Variety: Look for a retailer with a wide selection to find the perfect match for your style.
How to Apply Quest 3 Decals?
- Clean the Surface: Thoroughly clean your Meta Quest 3 with rubbing alcohol and a microfiber cloth to remove any dust or oils.
- Align the Decal: Carefully position the decal, ensuring proper alignment before applying.
- Apply Gradually: Slowly peel away the backing and press the decal onto the device, working out air bubbles as you go.
- Use Heat (Optional): For curved areas, applying gentle heat with a hairdryer can make the vinyl more pliable.
- Smooth and Trim: Use a squeegee or credit card to smooth out the decal and trim any excess edges.
Can you put stickers on your Oculus Quest?
Absolutely! You can deck out your Oculus Quest with stickers. Just keep a few things in mind:
- Avoid the cameras: Those little black dots on the headset are super important for tracking. Don’t cover them, or your VR experience might get a bit wonky.
- Think about wear and tear: Stickers look awesome, but if you’re constantly throwing your Quest in a bag, they might peel over time. Consider a full-on decal for better protection.
- Express yourself! This is the fun part! Go wild with colours, patterns, or even your favourite characters. Your Quest, your style!
Conclusion
Decals are a simple yet impactful way to personalize your Meta Quest 3. As VR technology continues to evolve, we can only anticipate even more innovative and exciting customization options in the future. Let decals be your first step into a world of fully personalized VR experiences.
FAQ
Can Quest 3 decals damage my headset?
High-quality Meta Quest 3 decals from reputable brands are made from vinyl that’s safe for your headset. They should not leave any residue when removed. However, always follow the manufacturer’s instructions for application and removal to avoid any issues.
Are Meta decals difficult to apply?
The difficulty of applying decals can vary. Most manufacturers include detailed instructions, and some even provide video tutorials. With a little patience and careful attention to detail, the process should be relatively straightforward. If you’re concerned, start with smaller or simpler decals before tackling a full wrap.
Will decals interfere with the Meta Quest 3’s sensors?
Reputable decal manufacturers precisely cut their products to avoid covering any of the Meta Quest 3’s sensors. However, improper application or extremely thick decals could potentially cause interference. Double-checking the sensor placement and carefully aligning the decals before application is essential.
