USB Update Mode Issue on Meta Quest 3s: The Meta Quest 3s VR headset offers an incredible virtual reality experience, but like any device, it can occasionally run into issues. One of the more frustrating problems that many new users have reported is the USB Update Mode loop, where the headset gets stuck in a screen that prevents it from booting properly. If you’re experiencing this issue, don’t worry—you’re not alone.
In this comprehensive guide, we’ll explain what the USB Update Mode is, why it happens, and offer clear, step-by-step solutions to help you get your MQ3s back up and running.
Read More: Protect Your Meta Quest 3S with KIWI Design Free VR Lens Guard – Worth $14.99
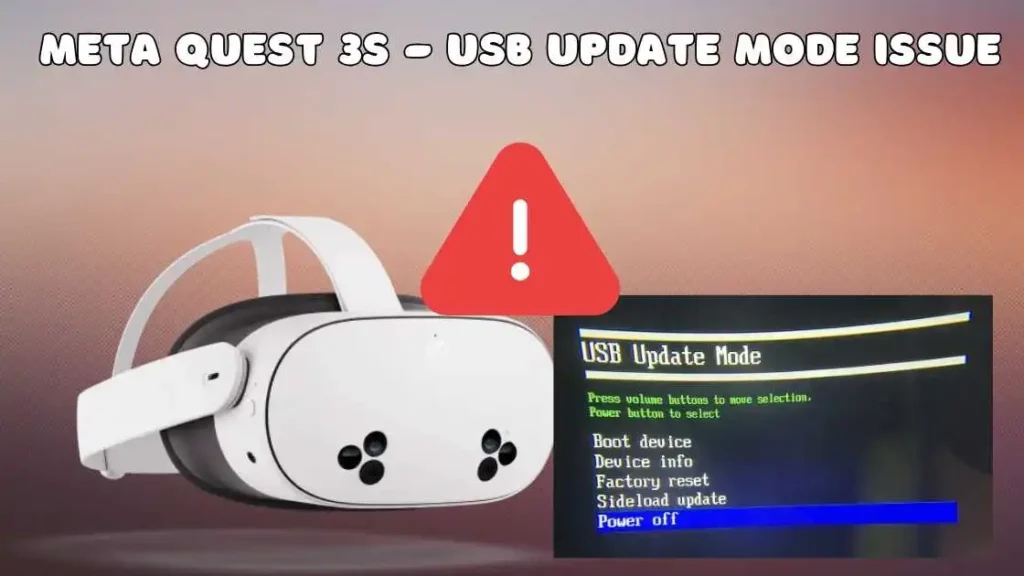
What is the USB Update Mode Issue on Meta Quest 3s?
The USB Update Mode is a state that the Quest 3s enters when it detects a software issue or fails to boot up properly. While it’s a troubleshooting mode, many users report that the headset gets stuck in this mode, rendering it unusable. This mode prevents you from accessing important functions such as performing a factory reset or sideloading updates.
Meta has acknowledged that this issue might be linked to recent software updates. Although a permanent fix is in progress, several steps can be taken in the meantime to resolve the issue.
Notably, this issue has been linked to recent software updates. Although Meta is working on a permanent fix, temporary solutions are available.
Some headsets are encountering a critical error after updating:
- The error message states “Your device is corrupt. It can’t be trusted.”
- Our best guess is that the updated image isn’t applying correctly, but there’s no solid answer yet.
- Not all devices are affected (some updates are complete normally).
Current Risks
- New headsets will automatically attempt to update, which can cause this issue.
- Factory resets are not fixing the problem and may make it worse.
- Some devices become completely unresponsive.
Why Does the USB Update Mode Issue Happen?
There are several potential causes for the USB Update Mode issue:
- Software Glitch: A failed or incomplete software update may cause the headset to enter this mode.
- Cable or Connection Problems: Using a low-quality or incompatible USB-C cable can interfere with the update process.
- Power Issues: If your headset isn’t charged properly, it may enter USB Update Mode as a safety precaution.
Meta is actively working on a software patch, but these steps will guide you in troubleshooting and resolving the issue in the interim.
Preventive Measures for Meta Quest 3s Owners
Here are some precautions to avoid encountering the USB Update Mode issue:
- Delay Turning On New Headsets: If you’ve just purchased a Meta Quest 3s, wait for Meta’s official communication about software fixes before activating it.
- Avoid Updates Temporarily: If your headset is functioning properly, hold off on updates until Meta releases a confirmed fix.
- Do Not Attempt Factory Resets on Black Screens: Resetting a device stuck on a black screen may worsen the issue.
How to Fix the USB Update Mode Issue on Meta Quest 3s?
Follow these steps to troubleshoot and resolve the USB Update Mode issue. Each method is designed to address the problem and help restore your headset to working order.
Step 1: Ensure the Correct Cable Is Used
Using the right USB-C cable is crucial for ensuring proper communication between your Quest s3 and your PC or charger.
- Use the Original Cable: The best solution is to use the USB-C cable that came with your Meta 3s headset.
- Try a High-Quality Cable: If the original cable is unavailable, make sure to use a high-quality USB-C cable from a reputable brand.
Note: Some users have reported that using a low-quality cable can cause the device to malfunction, so investing in a good one is essential.
Step 2: Check the Power Supply
Low battery or power issues are common causes of the USB Update Mode issue.
- Connect to Power: Ensure your headset is plugged into a power outlet using the charging cable.
- Wait for Charging: Let it charge for at least 30 minutes. Confirm that the charging LED lights are on, indicating that the device is charging properly.
Step 3: Try Sideloading Updates
If the device is still unresponsive, sideloading the latest update can sometimes help resolve the issue. This process requires a PC, a USB-C cable, and some necessary drivers.
- Install ADB Drivers: You’ll need to download and install the ADB (Android Debug Bridge) drivers to enable your PC to recognize your headset.
- Connect the Headset to Your PC: Use a USB-C cable to connect your Quest 3s to your computer.
- Access the Meta Quest Software Update Page: Visit the Meta Quest Software Update Page and follow the provided instructions to manually update your device.
- Follow the Instructions Carefully: Complete the update process by following all the on-screen steps.
Step 4: Perform a Factory Reset
If the device is still responsive, performing a factory reset may resolve the issue. Please note that a factory reset will erase all your data and settings, so make sure to back up anything important beforehand.
Here’s how to do a factory reset:
- Turn Off the Headset: Ensure the Quest 3s Meta is completely powered off.
- Enter Boot Menu: Press and hold the Power and Volume Down buttons simultaneously to access the boot menu.
- Select Factory Reset: Use the volume buttons to scroll to the Factory Reset option, then press the Power button to select it.
- Confirm Reset: Follow the on-screen instructions to complete the reset.
Step 5: Use the Software Update Tool
Meta has provided a Software Update Tool that can help resolve the USB Update Mode issue by enabling users to manually install the latest software updates. Here’s how to use the Software Update Tool:
Steps to Use the Meta Quest 3 Software Update Tool:
- Download the Software Update Tool:
- Visit the Meta Quest Software Update Page and download the Software Update Tool onto your PC. You’ll need a compatible PC with Windows 10 or later to use this tool.
- Install the ADB Drivers:
- Before using the tool, make sure you have ADB drivers installed on your PC. These drivers are necessary for the software tool to detect your headset.
- Connect the Quest 3 to Your PC:
- Use the USB-C cable to connect your headset to your computer. Make sure the connection is secure.
- Launch the Software Update Tool:
- Open the Software Update Tool on your PC. The tool should automatically recognize your Meta Quest s3 and check for the latest updates.
- Follow the Instructions:
- Follow the on-screen instructions to begin the update process. The tool will download and install any pending updates, helping resolve the USB Update Mode issue.
- Wait for the Update to Complete:
- The update may take some time, so make sure not to disconnect your headset during the process. Once the update is complete, your headset should boot up normally.
Step 6: Contact Meta Support
If none of the above steps resolve the issue, it’s time to contact Meta Support for further assistance. They may provide additional troubleshooting steps or confirm whether the problem is related to a hardware defect.
- Visit the Meta Support Page: Reach out to Meta Support by submitting a message or using their live chat option.
- Provide Detailed Information: Let them know what troubleshooting steps you’ve already attempted and any other relevant information. This will help the support team offer more targeted advice.
Additional Troubleshooting Tips
- Use a Higher-Quality USB-C Cable: Some users have resolved the issue by using a higher-quality USB-C cable, as the Quest 3s can be picky about cables.
- Update via PC: If the software update tool isn’t working, try connecting your Meta Quest 3 to a PC and sideloading the update.
- Leave the Headset Charging: In some cases, leaving the headset plugged into the charger overnight while it attempts to update has worked for several users.
Conclusion
Dealing with the USB Update Mode Issue on Meta Quest 3s can be frustrating, but with the steps outlined above, you should be able to resolve the issue and get your headset back to full functionality. Start by ensuring you’re using the correct USB-C cable and check that your headset has sufficient power. If these steps don’t work, try sideloading updates, performing a factory reset, or using the Meta Quest Software Update Tool for manual updates.
While Meta works on a permanent fix, these solutions should help you get past the USB Update Mode and enjoy your Meta Quest 3s once again. If the problem persists, don’t hesitate to reach out to Meta Support for further assistance.
FAQ: USB Update Mode Issue on Meta Quest 3s
1. How long should I leave the Meta Quest 3s plugged in to fix the USB Update Mode issue?
It’s best to leave the headset plugged in for at least 30 minutes to ensure it has enough power. Some users recommend leaving it plugged in overnight to allow the update process to complete.
2. What if my Meta Quest 3 is not recognized by my PC during sideloading?
Make sure you have installed the ADB drivers correctly. If the issue persists, try using a different USB-C cable or port. Also, ensure that your PC’s operating system is up to date.
3. Can I get a replacement if these troubleshooting steps don’t work?
Yes, if the issue persists despite following all troubleshooting steps, contact Meta Support for assistance. If necessary, they may offer a replacement headset or further troubleshooting.
Discover more from vskel.com
Subscribe to get the latest posts sent to your email.